
Plan a real estate video’s thumbnail before you film. Name the question the video answers, choose a visible example of that answer and capture a photograph you can use at a small size. Then check the image beside the title and the opening explanation. All three should describe the same useful lesson.
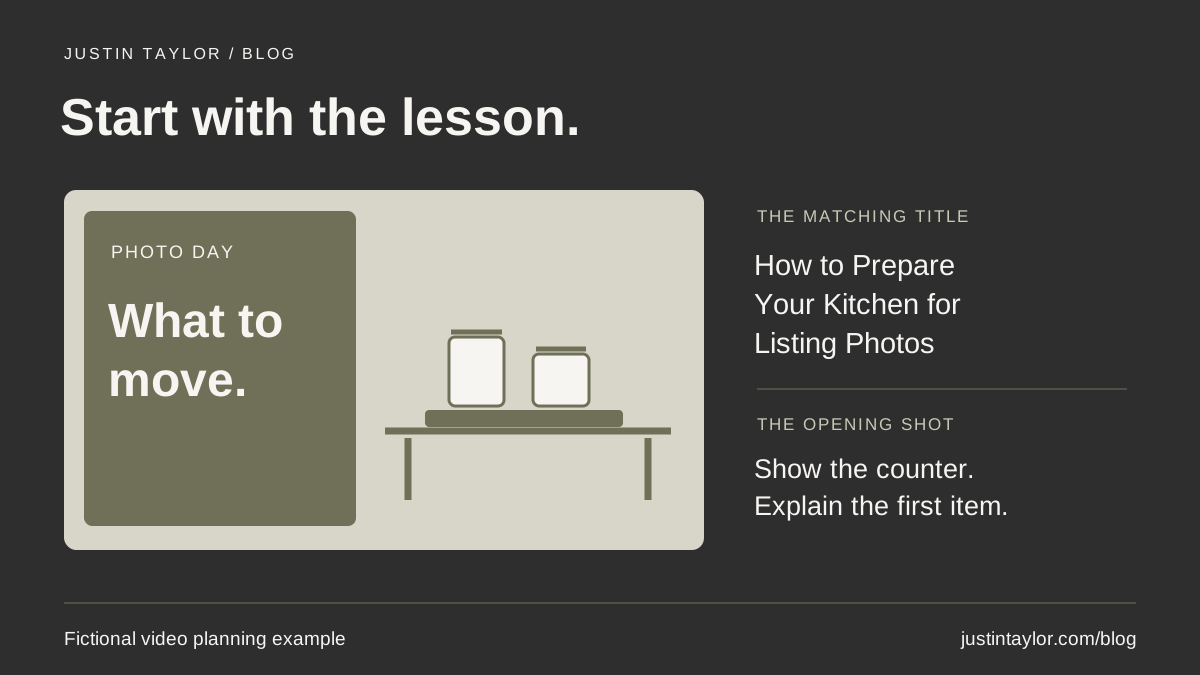
For an agent recording a guide to preparing for listing photos, that could mean a photograph of a kitchen counter, a short phrase about what to move and an opening demonstration of how to prepare that surface. A viewer can recognize the task before pressing play.
Semrush’s social media competitor analysis guide, dated November 9, 2026, recommends using relevant public content to identify opportunities worth testing. Apply that idea to the way videos introduce a client question. A quick review can inform your thumbnail brief without turning another creator’s design into your template. Read the Semrush guide.
Write the viewer’s question before the headline
Picture the person who needs your explanation. In this fictional example, a seller has listing photography scheduled and is looking at a kitchen they still use every day. Their question is, “What should I move before the photographer arrives?” They need a manageable preparation task.
Write a working title: How to Prepare Your Kitchen for Listing Photos. Under it, write the evidence the video will show: a demonstration counter, a place for temporarily removed items and a final check with the photographer’s preparation notes. Confirm those notes with the photographer before recording.
This gives the designer something concrete to depict. A thumbnail that says “What to move” can accompany a clearly staged counter. A price arrow or “Sell for more” headline would introduce a different promise, one this preparation lesson does not establish.
If the topic still contains several competing questions, narrow the recording first. The monthly real estate video plan can help separate photo preparation, showing preparation and moving-day organization into individual explanations.
Look at how similar questions are introduced
Find a few public videos addressing the same preparation task. Note each URL and the date you looked. For every title-and-image pair, finish this sentence: “I expect this video to show me…” Then play the opening and check that expectation.
Record what you can observe: a recognizable room, an unreadable list, an unexplained number or a photograph that becomes meaningful only after the presenter speaks. Public view counts alone cannot tell you which thumbnail caused a result. Leave judgments about another channel’s conversion rate or client inquiries out of this exercise.
Choose one lesson for your own brief. For example, if a crowded image makes the task hard to identify, show only the counter you will discuss. Keep your own photography, language and brand treatment. You are deciding how to explain your material.
Give the shoot one usable thumbnail brief
YouTube’s creator guidance recommends taking thumbnail photographs during the shoot and considering the title and image together. That is especially practical for real estate content: once the room is reset or the seller returns home, recreating the scene may be inconvenient. See YouTube’s thumbnail and title tips.
| Decision | Instruction for the shoot |
|---|---|
| Viewer’s task | Identify items to move temporarily before listing photos. |
| Visual subject | A demonstration counter with a small tray of everyday items beside a clear area. |
| Photograph | Take a horizontal still with the tray visible and open space on the left for wording. |
| Thumbnail wording | “What to move” — supported by the actual demonstration. |
| Opening proof | Show that same counter and explain the first item being moved. |
Capture the still while the person arranging the scene is available to make adjustments. Check reflections, distracting objects and the edges of the frame. Use a demonstration space you have permission to photograph, and remove personal paperwork before shooting.
Keep a version with extra space around the subject. An editor can crop that file in several ways without losing the tray. Save the original photograph with the video project and label which frame was approved. This also makes a later thumbnail revision easier to trace.
Review the small version beside the title
Place the draft thumbnail next to the proposed title in a simple document. Shrink the image to approximately the size you encounter on your phone. This is a working preview, not a platform dimension requirement. Ask a colleague who has not read the script what they expect to learn.
If they say “a kitchen makeover,” your tray or wording may be too ambiguous. Make the preparation task more visible. If they read only “photo day,” decide whether that is enough alongside the title. You do not need to squeeze the whole lesson into the image.
Use the site’s established olive, charcoal and warm-white palette for the label, with enough separation from the photograph to read it. Keep logos secondary to the subject. A brand treatment should help the series feel consistent while leaving each video’s particular question recognizable.
Finally, play the first part of the recording. The thumbnail’s counter should connect naturally to what the presenter shows. Fix a mismatch in the image, title or edit before publishing. The caption and clarity checklist covers another useful pass through the finished video.
Export and upload the approved image
For a standard horizontal video, YouTube currently recommends a 3840 × 2160-pixel thumbnail at 16:9, with a minimum width of 640 pixels. JPG and PNG are supported. Desktop uploads have a 50 MB limit; mobile video-thumbnail uploads have a 2 MB limit. Use the requirements for the device you will upload from. Your account must be verified to upload a custom thumbnail. Check YouTube’s current thumbnail requirements.
On a computer, open YouTube Studio → Content, select the video, and use Upload file under Thumbnail. Choose the approved image and save. Changes may take time to appear. Check the published video on desktop and phone once the new image is visible.
Test a clear difference when the channel is eligible
A second design could show the same tray closer to the camera while keeping the title and wording unchanged. That gives you a specific visual choice to investigate. Record the question behind the two designs before starting.
YouTube’s desktop A/B testing requires advanced features and an eligible video. Private, made-for-kids and age-restricted videos are excluded, along with Shorts, scheduled live streams and premieres still underway. For an eligible video, select A/B Testing → Thumbnail only, add up to three options and choose Done. Changing the title or thumbnail during the test stops it. Review YouTube’s testing guidance.
Tests can take up to two weeks. YouTube evaluates watch time, and a test may finish without a clear winner, including when impressions are insufficient. Keep that uncertainty in your notes. The outcome does not establish which version generated real estate business.
Save the approved brief, final image and one observation for the next shoot. For a broader review of the finished video, use the real estate video review routine. Each new recording is an opportunity to make the client’s next question easier to recognize.
Sources & further reading
Platform guidance and research referenced in this article. Reviewed November 13, 2026.

Growth & Strategy Manager at Inspire Title Team | WFG Title. Marketing and AI guidance for real estate professionals.